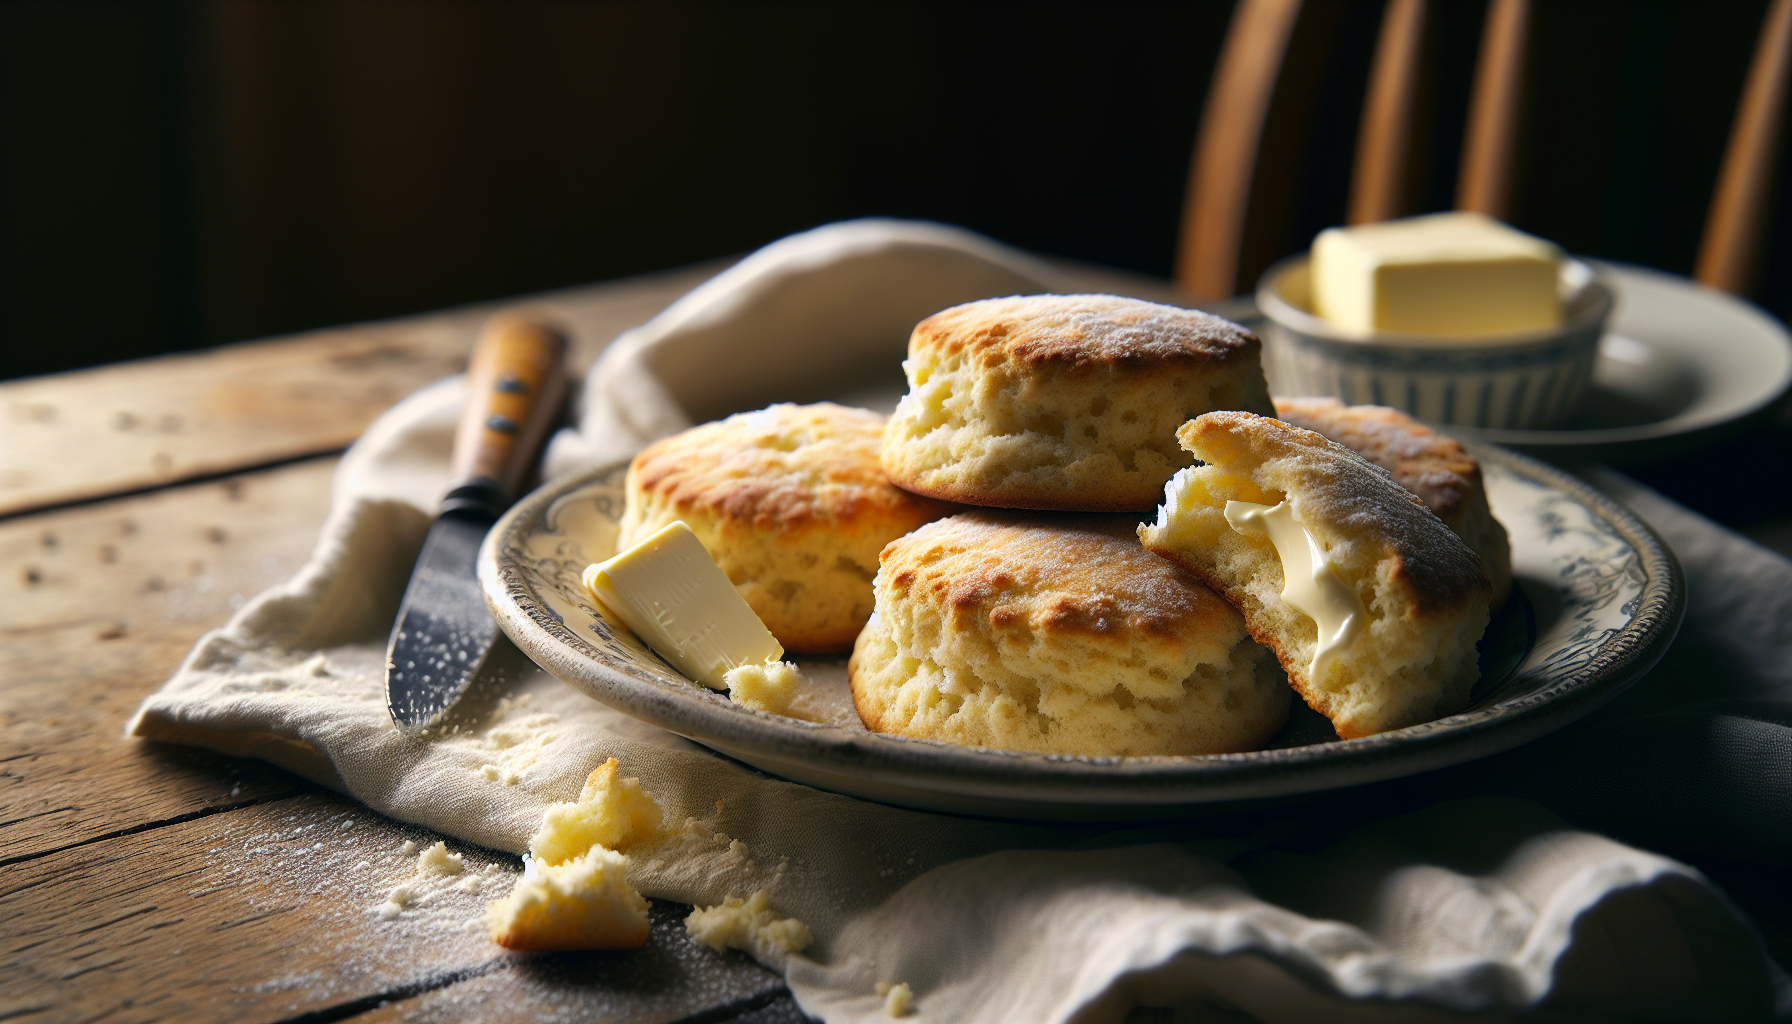
Fluffy Gluten-Free Biscuits

Longing for a warm, fluffy biscuit but need to skip the gluten? No worries! We’ve got you covered with this fluffy gluten-free biscuits recipe. Plus, it doesn’t use yeast, so it’s easy to make and perfect for those avoiding yeast.
When you’re looking to create fluffy gluten-free biscuits that don’t skimp on flavor, it’s essential to understand the right ingredients and techniques.
You might think gluten-free baking is tricky, but with the right blend of all-purpose flour and a few key additions, you’ll find it’s quite achievable.
Imagine biting into a warm biscuit, perfectly risen and airy, suitable for breakfast, lunch, or supper—or just as a healthy snack!
So, what are the crucial steps and tips that can elevate your biscuit game? Let’s explore the details that can make all the difference in your biscuit-baking endeavor.
{Affiliate links included below}
Ingredients You’ll Need
(Complete ingredients and instructions are found below in the recipe card.)
To whip up a batch of fluffy gluten-free biscuits, you’ll need a few key ingredients. First, grab some gluten-free all-purpose flour; this will serve as the base.
No products found.
You’ll also need baking powder (we recommend the aluminum-free kind) and baking soda (make sure it’s pure food-grade) to help those biscuits rise and become airy.
Don’t forget salt (this is the best sea salt!) for flavor and a little raw honey to balance it out.
Next you’ll need some butter or shortening to add that rich flavor.
For moisture, we recommend buttermilk. Or you could use regular milk or even a dairy-free alternative, along with melted butter or oil for richness.
If you’re feeling adventurous, consider adding herbs or cheese for extra flavor.
With these ingredients in hand, you’ll be set to create delicious biscuits that everyone can enjoy!

Step-by-Step Preparation
Start by preheating your oven to 450°F.
While the oven heats, mix your gluten-free flour, baking powder, baking soda, and salt in a large bowl. Cut in cold butter using a pastry cutter until the mixture resembles coarse crumbs.
Next, stir in any additional seasonings or herbs for extra flavor.
Gradually add buttermilk and honey, mixing until just combined. Don’t overwork the dough; you want it to be light and fluffy.
Turn the dough onto a floured surface and gently pat it into a thick rectangle. Use a biscuit cutter to cut out your biscuits and place them on a baking sheet lined with parchment paper.
Bake for 12 to 15 minutes or until golden brown, and serve warm, topped with butter, honey, or jelly.

Baking Tips for Success
Baking gluten-free biscuits can often feel tricky, but with a few essential tips, you’ll achieve perfect results every time.
Start by measuring your gluten-free flour accurately; too much can lead to dense biscuits. Use a premade blend of all-purpose gluten-free flours for the best texture.
When mixing, handle the dough gently and avoid overworking it; this keeps your biscuits light and fluffy.
Always preheat your oven to ensure even baking, and consider using a baking sheet lined with parchment paper for easy cleanup.
Lastly, keep an eye on baking time to prevent overbaking; golden tops are your sign of perfection!
Serving Suggestions
After you’ve mastered the art of making fluffy gluten-free biscuits, it’s time to think about how to serve and enjoy them.
These biscuits are incredibly versatile and can elevate any meal. Slather them with butter and your favorite jam or preserve (this one is incredible!) for a delightful breakfast treat.
Or pair them with savory dishes like chili or hearty stew, offering a perfect side that complements the flavors.
You can even slice them in half and fill them with fried chicken or turkey for a delicious sandwich.
And for a sweet twist, top them with whipped cream and fresh berries for a delightful dessert.
No matter how you serve them, these biscuits are sure to impress and satisfy your cravings—all without the gluten.
Enjoy experimenting with different toppings and pairings!

Storage Methods and Shelf Life
To keep your fluffy gluten-free biscuits fresh and delicious, proper storage is essential. After baking, let them cool completely before storing.
Place your biscuits in an airtight container at room temperature for up to three days.
If you want to extend their shelf life, consider freezing them. Wrap each biscuit tightly in plastic wrap, then place them in a freezer-safe bag or container. They can last up to six months in the freezer.
When you’re ready to enjoy, simply thaw them at room temperature or reheat them in the oven for a few minutes. Avoid refrigerating your biscuits, as this can make them dry out.
With these storage methods, you can savor your biscuits at their best!

Frequently Asked Questions
Can I Substitute Almond Flour for the Gluten-Free Flour Blend?
Yes, you can substitute almond flour for a gluten-free flour blend, but be aware that it may change the texture and flavor.
Adjust the liquid in your recipe to ensure the right consistency.
How Do I Make These Biscuits Dairy-Free?
To make these biscuits dairy-free, substitute regular milk with almond or coconut milk, and replace butter with a dairy-free alternative like shortening, coconut oil or vegan butter.
Your biscuits will still turn out delicious and fluffy!
What Is the Best Way to Reheat Leftover Biscuits?
To reheat leftover biscuits, you can wrap them in a damp paper towel and microwave for 10-15 seconds.
Alternatively, place them in a preheated oven at 350°F for about 5-10 minutes for a crispier texture.
Can I Freeze the Dough Before Baking?
Yes, you can freeze the dough before baking.
Just shape the biscuits, wrap them tightly, and store in the freezer.
When you’re ready, bake them straight from frozen, adding a few extra minutes to the time.
What Are Some Flavor Variations for These Biscuits?
You can experiment with various flavor variations by adding herbs, spices, or cheese.
Try incorporating garlic powder, rosemary, or cheddar for savory options, or mix in cinnamon (this cinnamon is amaaazing!) and sugar for a sweet twist.
Be creative and you may find a new favorite!

Wrapping It Up
Congratulations, you’ve just mastered the art of making fluffy gluten-free biscuits!
With simple ingredients and a straightforward process, you can enjoy these delightful treats any time.
Whether you savor them fresh from the oven or freeze them for later, they’re sure to please.
And remember to experiment with different serving suggestions to find your favorite way to enjoy these biscuits.
So, gather your ingredients and get baking—your taste buds will thank you!
Fluffy Gluten Free Biscuits
4
servings30
minutes40
minutes300
kcal1
hour10
minutesDelicious gluten free biscuits that are light and fluffy.
Keep the screen of your device on

Ingredients
2 cups gluten free flour
1 tbsp baking powder
1/2 tsp baking soda
1/2 tsp salt
1/2 cup cold butter, cubed
1 cup buttermilk
1 tbsp honey
Directions
- Preheat the oven to 450°F (230°C).
- In a large bowl, sift together the gluten free flour, baking powder, baking soda, and salt.
- Using a pastry cutter or your fingers, cut in the cold butter until the mixture resembles coarse crumbs.
- Make a well in the center of the mixture and add the buttermilk and honey.
- Stir until just combined, being careful not to overmix.
- Turn the dough out onto a floured surface and gently pat it into a 1-inch thick rectangle.
- Use a biscuit cutter to cut out biscuits and place them on a baking sheet.
- Bake for 12-15 minutes, or until the biscuits are golden brown.
- Serve warm and enjoy!

Equipment
 Baking SheetBuy on Amazon
 Mixing BowlBuy on Amazon
Nutrition Facts
- Serving Size: 1g
- Total number of serves: 12
- Calories: 180kcal
- Carbohydrates: 22g
- Protein: 2g
- Fat: 9g
- Saturated Fat: 5g
- Polyunsaturated Fat: 1g
- Monounsaturated Fat: 3g
- Trans Fat: 0g
- Cholesterol: 20mg
- Sodium: 350mg
- Potassium: 60mg
- Fiber: 1g
- Sugar: 2g
- Vitamin A: 6IU
- Vitamin C: 0mg
- Calcium: 80mg
- Iron: 1mg
Like this recipe?
Follow @wellnessrokstar on Pinterest


